The short version
In Fill labels, choose Spreadsheet, import your Excel file, and match the columns to label fields. Each row supplies a label’s information. Review the addresses and print using the layout for your label paper.
1. Organize your spreadsheet
Keep each recipient and their address on the same row, with clear headings for the information in each column. Choose a label design with room for the fields you need.
| Recipient Name | Street Address | City, State, and ZIP |
|---|---|---|
| Alex Morgan | 125 Example Lane | Portland, OR 97205 |
| Jordan Lee | 42 Sample Avenue | Austin, TX 78701 |
| Sam Rivera | 18 Demo Street | Boston, MA 02108 |
2. Import and match your columns
Choose Spreadsheet in Fill labels and import your Excel file. Select the worksheet you want to use, then match its columns to the corresponding label fields. Columns you do not need can be left unused.
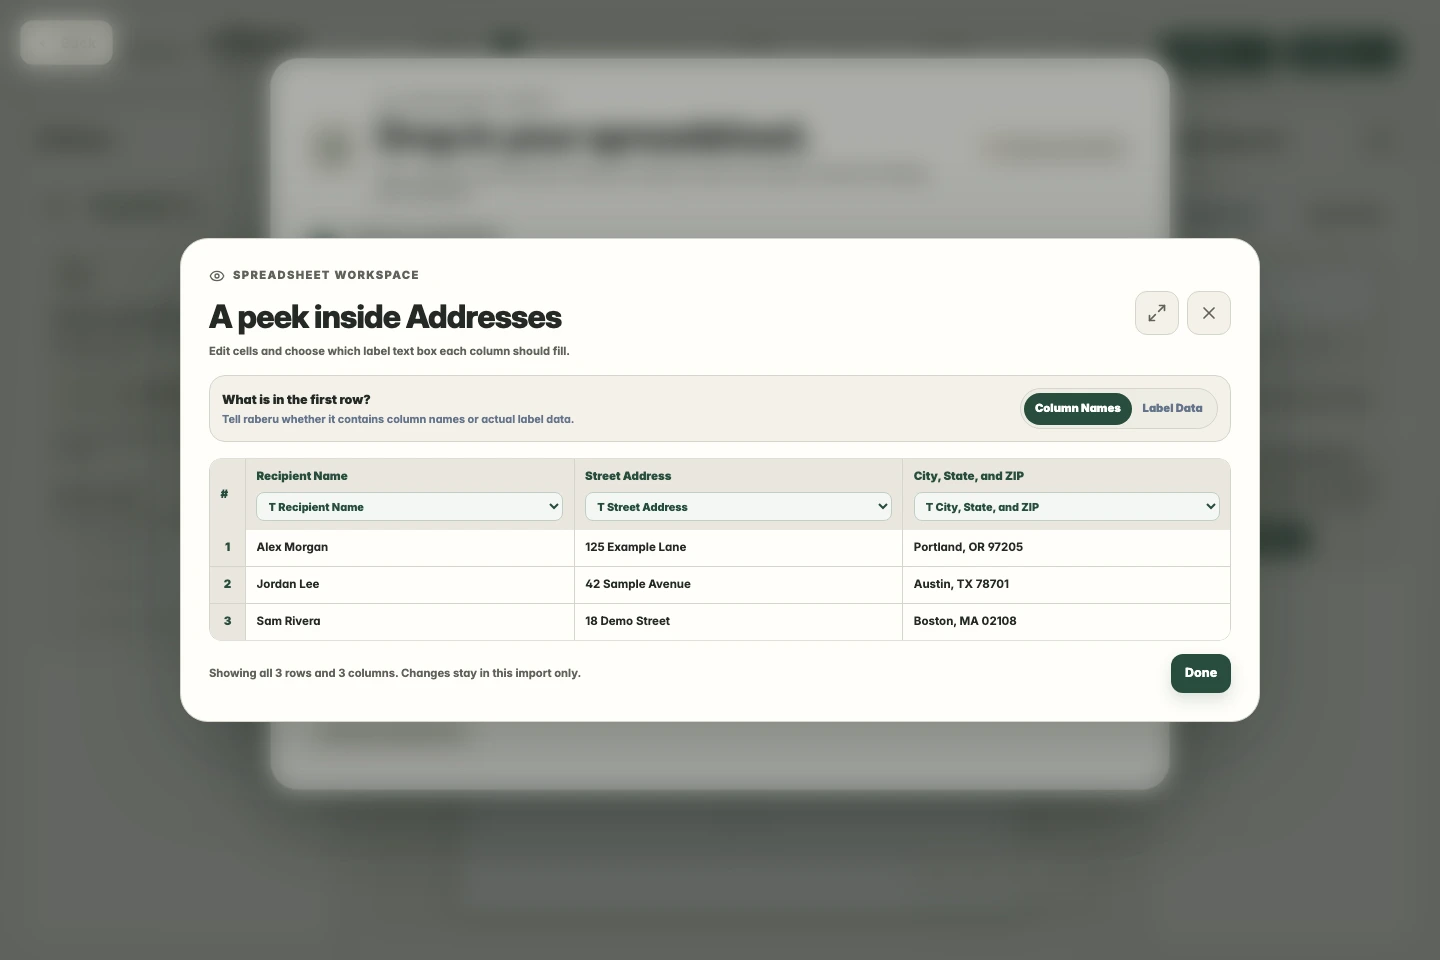
3. Review the addresses
Check the import preview and create the labels when the mapping looks right. Review the names, addresses, and text fit across the sheet before printing.
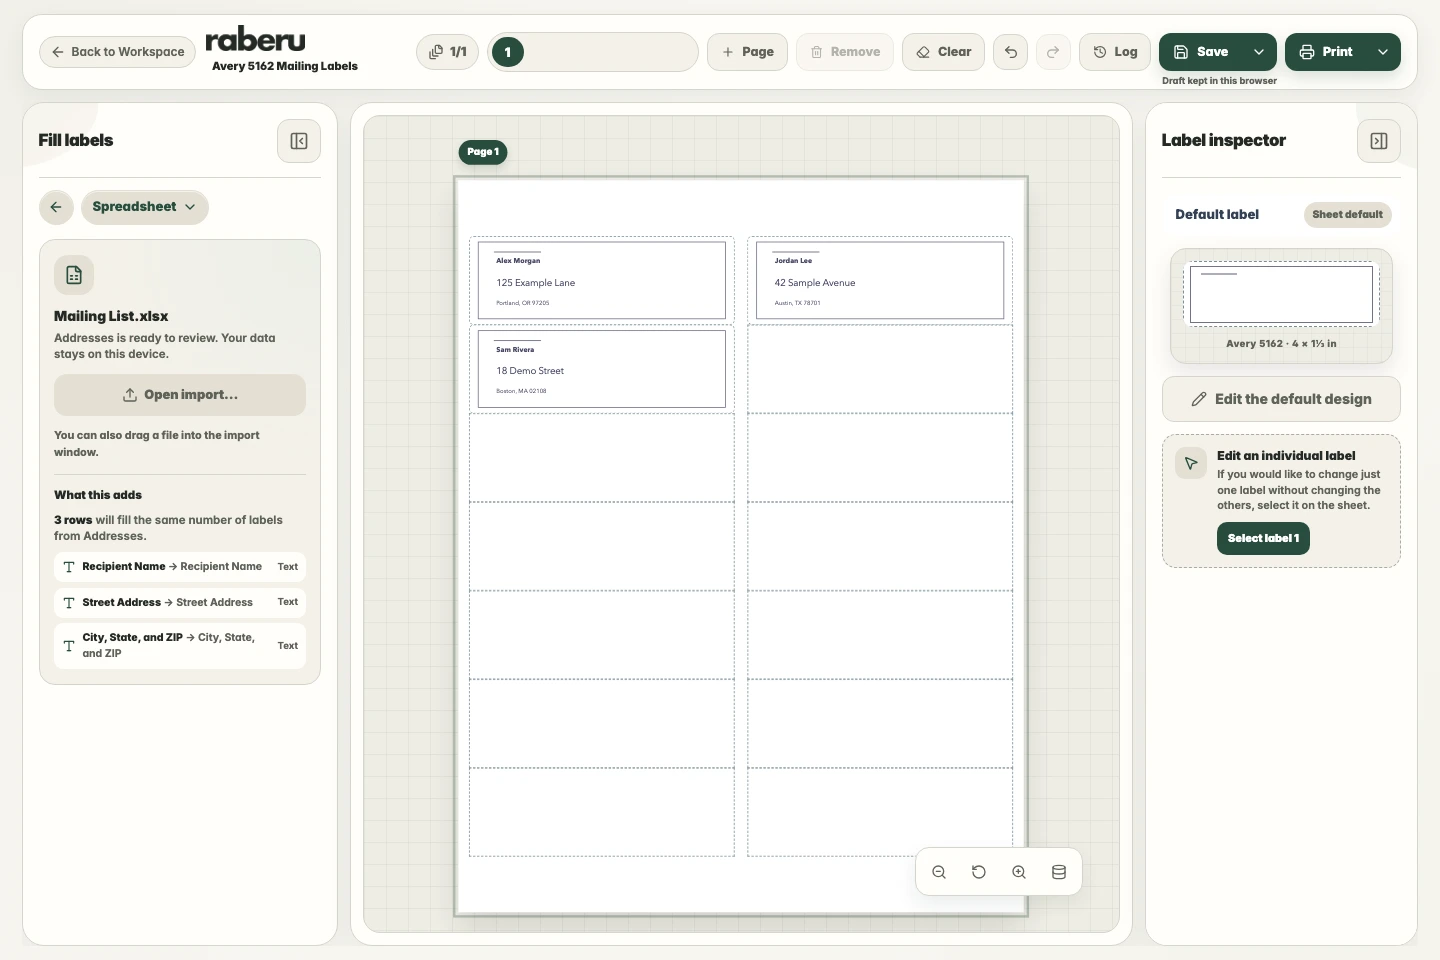
4. Review and print
Check that the text fits and the sheet matches your label paper. Use Printer setup to check alignment before printing. Choose the correct paper size and Actual size or 100% scale in the print window.
Help with print alignmentCommon questions
Should I use List or Spreadsheet?
Use List when you want to paste values into one field. Use Spreadsheet when each row contains several pieces of information that need to stay together, such as a recipient’s name and address. Match the columns to the fields in your design.